WARNING: YAML Heavy post. Sorry.
So I have been internally debating the best way to share this latest little thing I was working on/ learning. My goal over 2018 is to post more on migrating applications from virtual to containers managed by K8s. That transition isn’t for everything and has definetley required diving more into applications. There are many Kubernetes concepts I am going to skip over as others may already have explained them better. I do plan on doing a vSphere to K8s quick and easy to help us VCP’s and other Virtual Admins get started.
OK, getting started. Define some concepts
Anaconda, Conda for short.
Conda is a python package and environment manager for Data Science. You can download Anaconda here:
https://www.anaconda.com/download/
I wanted to keep it running in my lab and even though it works just fine on my local laptop, I switch between PC and Mac (2 of them) and wanted my environment (and data) available from a central place. Plus, I can’t learn Kubernetes without real applications to run.
Jupyter

Jupyter is an open source web application that allows you to display interactive code, equations and visualizations. I use it for Data Analytics in Python.
So jupyter is an application that can run in your conda environment. I want to run it as a container with persistent NFS storage in my Kuberenetes cluster in my basement. Notebooks are the files that contain the code and visualizations. I can post notebooks to github to allow others to test my work. In the github repo, I included a very basic file with some python. Once you have this all running you can play with it if you would like.
So how to get it to run. ContinuumIO the keepers of Anaconda provide a container image and some basic instructions for running the container on Docker. I googled for ways that people provide this in cluster environment. In the near future Jupyterhub will be the solution for you if you want multi-tenant jupyter deployments with Oauth and all kinds of fancy features I do not need in my tiny lab.
The following files are all available on my github at Conda-K8s. This worked in my environment with Kuberenetes 1.9. Your mileage may vary depending on access rights, version and anything you do that I don’t know about.
First create the persistent volume you will need to create and edit the following nfs-pv.yaml file.
nfs-pv.yaml
apiVersion: v1
kind: PersistentVolume
metadata:
  name: conda-notebooks
spec:
  capacity:
    storage: 100Gi
  accessModes:
    - ReadWriteMany
  nfs:
    # FIXME: use the right IP and the right path
    server: 192.168.x.x
    path: "/nfs/repos/yourvalidpath"
First make sure you edit the file with your NFS server IP and valid already created path to your NFS Share. This is where your jupyter notebook data will be stored. If the POD crashes or the host server dies it will start elsewhere in the cluster, your data will persist. Brilliant!
IF you want an automated way to create, mount and manage these volumes with Pure Storage check our our awesome flexvolume plugin for Kubernetes. Right now we will focus on making it work with any NFS path. This is manual and slow, so if you are serious about analytics get the plugin, and a FlashBlade.
$kubectl create -f nfs-pv.yamlThen to view if your volume is ready run:
$kubectl get pv
Output for my system
NAME                                 CAPACITY   ACCESS MODES   RECLAIM POLICY   STATUS     CLAIM                                        STORAGECLASS   REASON    AGE
claim-jowings                        10Gi       RWX            Retain           Released   jupyter4me/hub-db-dir                                                 3d
conda-notebooks                      100Gi      RWX            Retain           Bound      default/conda-claim                                                   3d
Now that the volume object is created we can now create the “claim”
I am not going to get into the why of doing this but as far as my tiny brain can understand it is the way K8s manages what application can connect with what persistent volume. Notice how the request section of the yaml is asking for 100Gi, the size of my volume in the last step.
nfs-pvc.yaml.
apiVersion: v1
kind: PersistentVolumeClaim
metadata:
  name: conda-claim
spec:
  accessModes:
    - ReadWriteMany
  storageClassName: ""
  resources:
    requests:
      storage: 100Gi
kubectl create -f nfs-pvc.yamlTo view the results
kubectl get pvcFinally we can create the POD. The pod is what kubernetes uses to schedule a application and its most basic component. It can be just one container. It can be more, for now we won’t get into what all that means.
conda-pod.yaml
kind: Pod
apiVersion: v1
metadata:
  generateName: conda-
  labels:
    app: conda
spec:
  volumes:
    - name: conda-volume
      persistentVolumeClaim:
       claimName: conda-claim
  containers:
    - name: conda
      image: continuumio/anaconda3
      env:
      - name: JUPYTERCMD
        value: "/opt/conda/bin/conda install jupyter nb_conda -y --quiet && /opt/conda/bin/jupyter notebook --notebook-dir=/opt/notebooks --ip='*' --port=8888 --no-browser --allow-root"
      command: ["bash"]
      args: ["-c","$(JUPYTERCMD)"]
      ports:
        - containerPort: 8888
          name: "http-server"
      volumeMounts:
        - mountPath: "/opt/notebooks"
          name: conda-volume
If you take a look at the file above there are some things we are doing to get conda and jupyter to work. First notice the “env” section I created. I didn’t want to create a custom container image but rather use the default image provided by continuumio. I don’t want to accidentally become reliant on my own proprietary image. Without the command and the arguments in the $JUYPTERCMD environment variable, the container starts, has nothing to do, and shuts down. K8s sees this as a failure so it starts it again (and again and again). Also we see in the volumes section we are telling the POD to use our “conda-claim” we created in the last step. Under containers the volumeMounts declaration tells k8s to mount the pv to the mountPath inside the container.
kubectl create -f conda-pod.yamlNow lets see what the results look like:
kubectl get pod
NAME                                     READY     STATUS    RESTARTS   AGE
conda-742lc                              1/1       Running   0          2d
Very good, the pod is running and we have a “READY 1/1”
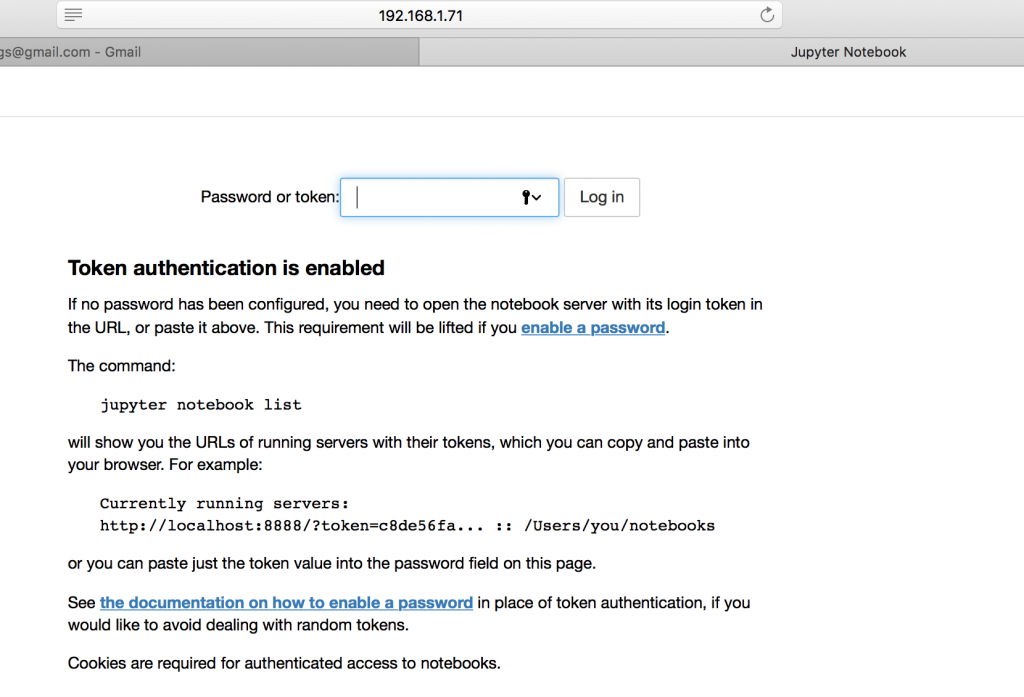
A few things we need to connect to the jupyter notebook. Run the following command and notice the output. It gives you a URL with a token to access the web app. Obviously localhost is going to not work from my remote workstations. Save that token for later though.
$kubectl logs conda-742lc


Package plan for installation in environment /opt/conda:

The following NEW packages will be INSTALLED:

    _nb_ext_conf:     0.4.0-py36_1
    nb_anacondacloud: 1.4.0-py36_0
    nb_conda:         2.2.1-py36h8118bb2_0
    nb_conda_kernels: 2.1.0-py36_0
    nbpresent:        3.0.2-py36h5f95a39_1

The following packages will be UPDATED:

    anaconda:         5.0.1-py36hd30a520_1  --> custom-py36hbbc8b67_0
    conda:            4.3.30-py36h5d9f9f4_0 --> 4.4.7-py36_0
    pycosat:          0.6.2-py36h1a0ea17_1  --> 0.6.3-py36h0a5515d_0

+ /opt/conda/bin/jupyter-nbextension enable nbpresent --py --sys-prefix
Enabling notebook extension nbpresent/js/nbpresent.min...
      - Validating: OK
+ /opt/conda/bin/jupyter-serverextension enable nbpresent --py --sys-prefix
Enabling: nbpresent
- Writing config: /opt/conda/etc/jupyter
    - Validating...
      nbpresent  OK

+ /opt/conda/bin/jupyter-nbextension enable nb_conda --py --sys-prefix
Enabling notebook extension nb_conda/main...
      - Validating: OK
Enabling tree extension nb_conda/tree...
      - Validating: OK
+ /opt/conda/bin/jupyter-serverextension enable nb_conda --py --sys-prefix
Enabling: nb_conda
- Writing config: /opt/conda/etc/jupyter
    - Validating...
      nb_conda  OK

[I 17:09:25.393 NotebookApp] [nb_conda_kernels] enabled, 3 kernels found
[I 17:09:25.399 NotebookApp] Writing notebook server cookie secret to /root/.local/share/jupyter/runtime/notebook_cookie_secret
[W 17:09:25.421 NotebookApp] WARNING: The notebook server is listening on all IP addresses and not using encryption. This is not recommended.
[I 17:09:26.044 NotebookApp] [nb_anacondacloud] enabled
[I 17:09:26.050 NotebookApp] [nb_conda] enabled
[I 17:09:26.095 NotebookApp] ✓ nbpresent HTML export ENABLED
[W 17:09:26.095 NotebookApp] ✗ nbpresent PDF export DISABLED: No module named 'nbbrowserpdf'
[I 17:09:26.098 NotebookApp] Serving notebooks from local directory: /opt/notebooks
[I 17:09:26.098 NotebookApp] 0 active kernels
[I 17:09:26.098 NotebookApp] The Jupyter Notebook is running at: http://[all ip addresses on your system]:8888/?token=08938eb3b2bc00f350c43f7535e38f6aa339f5915e12d912
[I 17:09:26.098 NotebookApp] Use Control-C to stop this server and shut down all kernels (twice to skip confirmation).
[C 17:09:26.099 NotebookApp]

    Copy/paste this URL into your browser when you connect for the first time,
    to login with a token:
        http://localhost:8888/?token=08938<blah blah blah
We must create a “service” in Kubernetes in order for the application to be accessible. There is a ton about services and ingress into applications. Since I am running on an private cluster. Not on Google or Amazon I am going to use the simplest way for this post to create external access. That is done using the “type” under the spec. See how it says NodePort? Also I am not specifying an inbound port (you can do that if you want). I am just telling it to find the app called “conda” and forward traffic to tcp 8888.
conda-svc.yaml
kind: Service
apiVersion: v1
metadata:
  name: conda-svc
spec:
  type: NodePort
  ports:
    - port: 8888
  selector:
    app: conda
kubectl create -f conda-svc.yamlThis creates the service from the file. This is actually a cool concept that allows the inbound traffic management (ingress) be disaggregated from the application pod/deployment. That means I can swap versions of the app without changing the inbound rules or loadbalancers (lb is a whole book unto itself). To see my services now I run:
$ kubectl get svc
NAME                              TYPE        CLUSTER-IP       EXTERNAL-IP   PORT(S)           AGE
conda-svc                         NodePort    10.98.67.191     <none>        8888:32250/TCP    2d
kubernetes                        ClusterIP   10.96.0.1        <none>        443/TCP           36d
mc-nash-minecraft                 NodePort    10.105.112.153   <none>        25565:31642/TCP   31d
mc-shea-minecraft                 NodePort    10.111.206.174   <none>        25565:31048/TCP   31d
mc-survival-minecraft             NodePort    10.99.46.7       <none>        25565:31723/TCP   31d
prom-2vcps-prometheus-server-np   NodePort    10.104.173.0     <none>        80:31400/TCP      30d
Great, now we see the service is forwarding port 32250 (yours will be different) to 8888. Using the node port type I can actually hit any node in my cluster and my K8s CNI will forward the traffic.
now just go to and paste your token from earlier.
http://<a node ip>:32250/

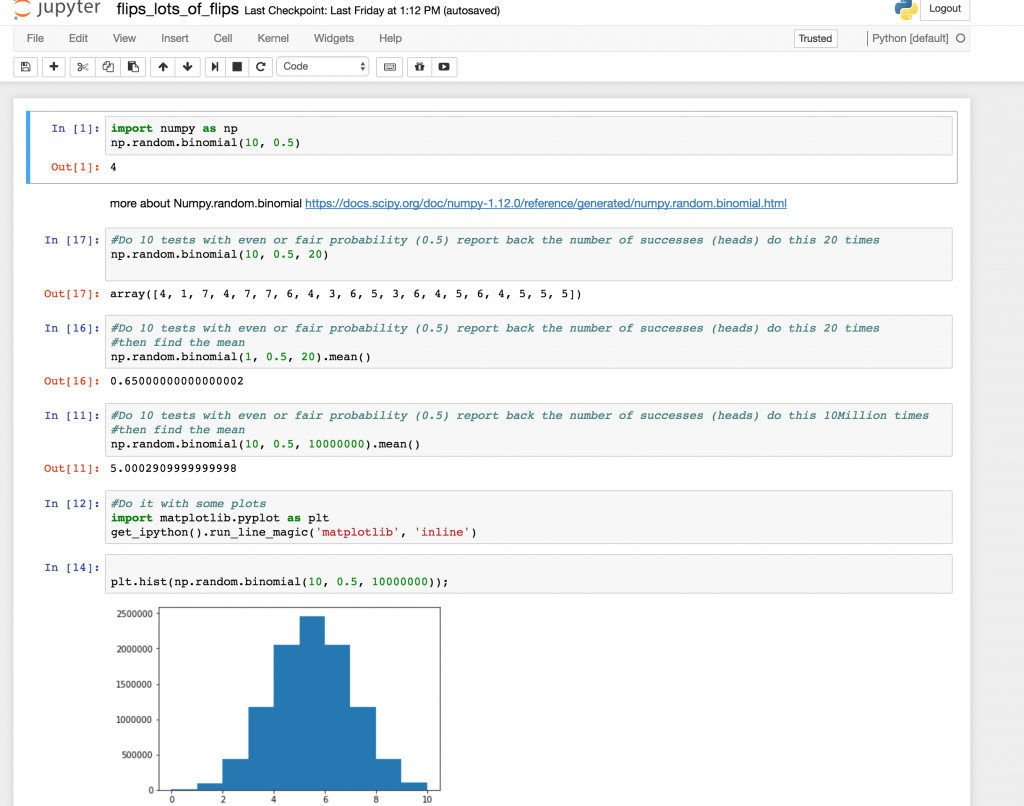
In my github repo for this project I included a basic notebook file that shows some python code to simulate coin flips many many times. Feel free to “upload” and play with it and have fun with Data Science on Juypter / Conda running in a K8s cluster.
