Please welcome Simon making a guest appearance to go through whatever it is this is about. 🙂 – Jon
Got to love those TLAs!!
To demystify the title of this blog, this will be about installing Pure Service Orchestrator (PSO) with Docker Kubernetes Service (DKS).
Specifically, I’ll be talking about PSO CSI driver v5.0.8, running with Docker EE 3.0 and the Universal Control Plane (UCP) 3.2.6, managing Kubernetes 1.14.8.
Let’s assume you have Docker Enterprise 3.0 installed on 3 Linux nodes, in my case they are running Ubuntu 18.04. You decide you want them to all run the Docker Kubernetes Service (DKS) and have any persistent storage provided by your Pure Storage FlashArray or FlashBlade – how do you go about installing all of these and configuring them?
Pre-Requisites
As we are going to be using PSO with Pure Storage array for the persistent storage, ensure that all nodes that will part of DKS have the following software installed:
- nfs-common
- multipath-tools
Install UCP
The first step to getting your DKS environment up is to install the Docker Universal Control Plane (UCP) from the node you will be using as your master.
As PSO supports CSI snapshots, you will want to ensure that when installing UCP, you tell it to open the Kubernetes feature gates, thereby enabling persistent volumes snapshots through PSO.
The command to install UCP is:
# docker container run --rm -it --name ucp \
  -v /var/run/docker.sock:/var/run/docker.sock \
  docker/ucp:latest install --host-address <host IP> \
  --interactive --storage-expt-enabled
If you don’t want to open the feature gates, don’t use the --storage-expt-enabled switch in the install command.
Answer the questions the install asks, wait a few minutes,
and voila you have Docker UCP installed and can access it through its GUI at http://<host IP>. Note that you
may be prompted to enter your Docker EE license key on the first login.
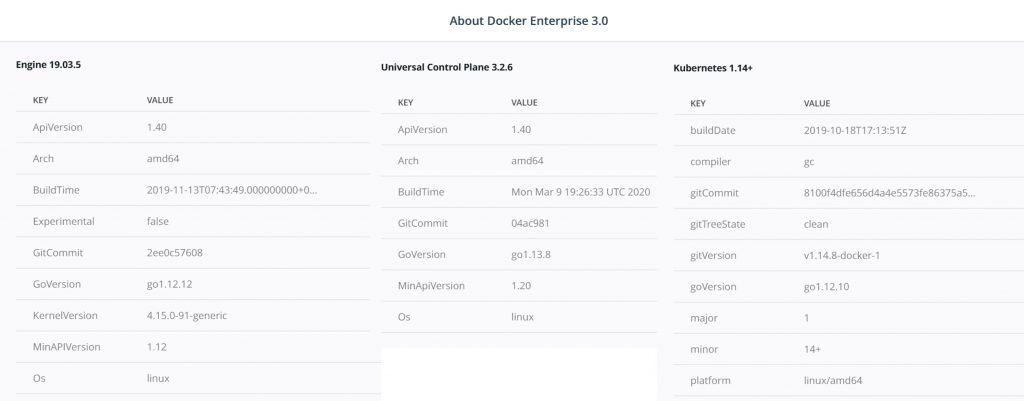
When complete you will have a basic, single node, environment consisting of docker EE 3.0, UCP 3.2.6 and Kubernetes 1.14.8.
Add Nodes to Cluster
Once you have your master node up and running, you can add your two worker nodes to the cluster.
The first step is to ensure your default scheduler is Kubernetes, not Swarm. If you don’t set this pods will not run on the worker nodes due to taints that are applied.
Navigate to your username in the left pane and select Admin Settings and then Scheduler. Set the default Orchestrator type to Kubernetes and save your change
Now to add nodes navigate to Shared Resources and select Nodes and then Add Nodes. You will see something like this:
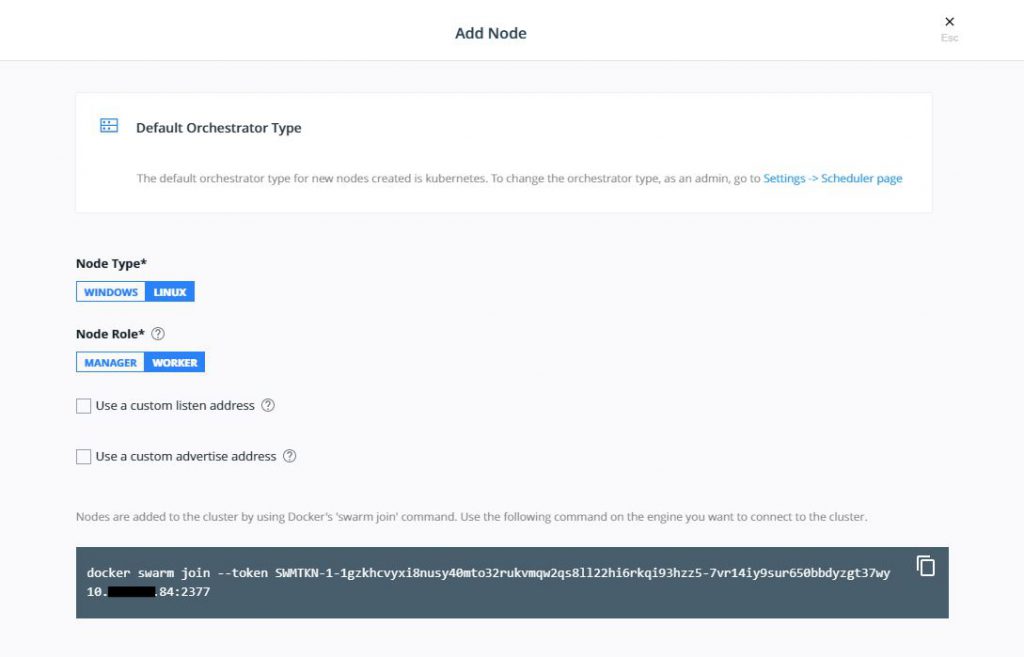
Use the command on each worker node to get them to join the Kubernetes cluster. When complete, your nodes should be correctly joined and look like this is your Nodes display.

You now have a fully functioning Kubernetes cluster managed by Docker UCP.
Get your client ready
Before you can install PSO you need to install a Docker Client Bundle onto your local node that will be used to communicate with your cluster. I use a Windows 10 laptop, but run the Ubuntu shell provided by Windows to do this.
To get the bundle, navigate to your user profile, select Client Bundles and then Generate Client Bundle from the dropdown menu. Unzip the tar file you get into your working directory.
Next, you need to get the correct kubectl version, which with UCP 3.2.6 is 1.14.8, by running the following commands:
# curl -LO https://storage.googleapis.com/kubernetes-release/release/v1.14.8/bin/linux/amd64/kubectl
# chmod +x ./kubectl
# mv ./kubectl /usr/local/bin/kubectl
Check your installation by running the following commands:
# kubectl version
Client Version: version.Info{Major:"1", Minor:"14", GitVersion:"v1.14.8", GitCommit:"211047e9a1922595eaa3a1127ed365e9299a6c23", GitTreeState:"clean", BuildDate:"2019-10-15T12:11:03Z", GoVersion:"go1.12.10", Compiler:"gc", Platform:"linux/amd64"}
Server Version: version.Info{Major:"1", Minor:"14+", GitVersion:"v1.14.8-docker-1", GitCommit:"8100f4dfe656d4a4e5573fe86375a5324771ec6b", GitTreeState:"clean", BuildDate:"2019-10-18T17:13:51Z", GoVersion:"go1.12.10", Compiler:"gc", Platform:"linux/amd64"}
# kubectl get nodes
NAME      STATUS   ROLES   AGE   VERSION
docker1   Ready    master  24h   v1.14.8-docker-1
docker2   Ready    <none>  24h   v1.14.8-docker-1
docker3   Ready    <none>  24h   v1.14.8-docker-1
Now we are nearly ready to install PSO, but PSO requires Helm, so now we install Helm3 (I’m using v3.1.2 here, but check for newer versions) and validate:
# wget https://get.helm.sh/helm-v3.1.2-linux-amd64.tar.gz
# tar -zxvf helm-v3.1.2-linux-amd64.tar.gz
# mv linux-amd64/helm /usr/bin/helm
# helm version
version.BuildInfo{Version:"v3.1.2", GitCommit:"d878d4d45863e42fd5cff6743294a11d28a9abce", GitTreeState:"clean", GoVersion:"go1.13.8"}
And finally…
We are ready to install PSO.. Here we are just going to follow the instructions in the PSO GitHub repo, so check in their for updates if you are reading this in my future…
# helm repo add pure https://purestorage.github.io/helm-charts
# helm repo update
So the latest version at this time is 5.0.8, so we should get the values.yaml configuration file that matches this version…
# wget https://raw.githubusercontent.com/purestorage/helm-charts/5.0.8/pure-csi/values.yaml
Edit this file to add your site-specific information, especially the information for your backend arrays and eventually install PSO:
# kubectl create namespace <name>
# helm install pure-storage-driver pure/pure-csi --namespace <name> -f ./values.yaml
Done!!
What does this look like in Docker UCP you ask, well this is what you will see in various screens:
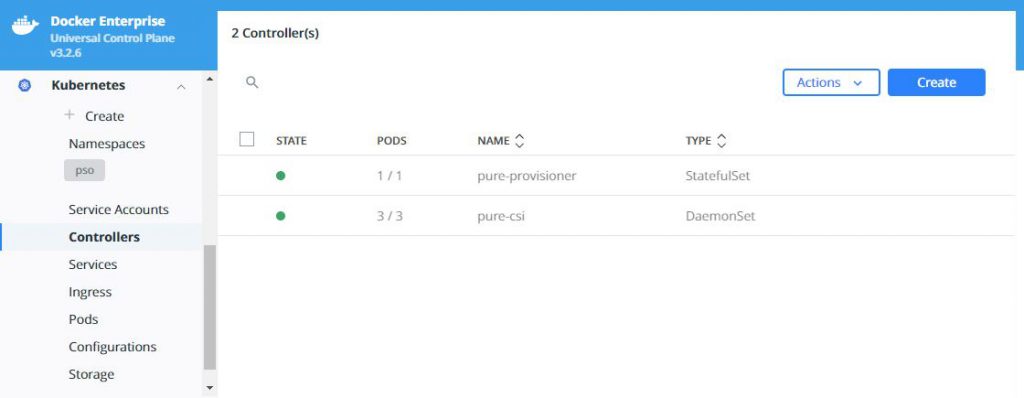
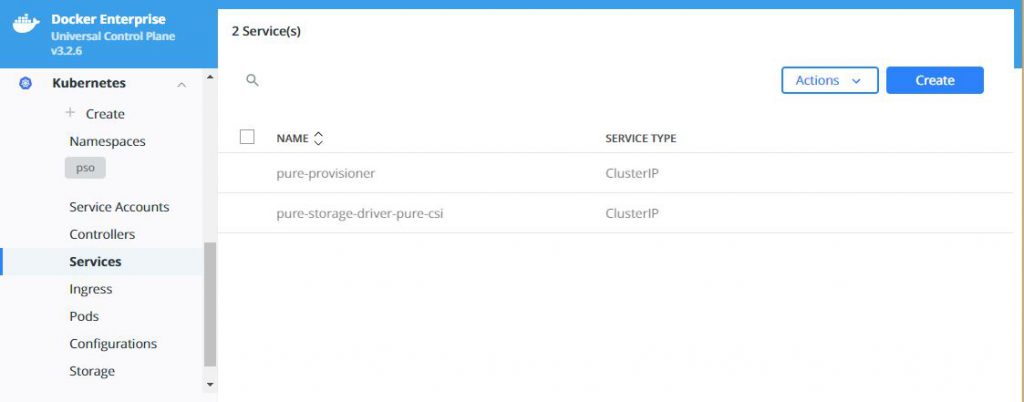
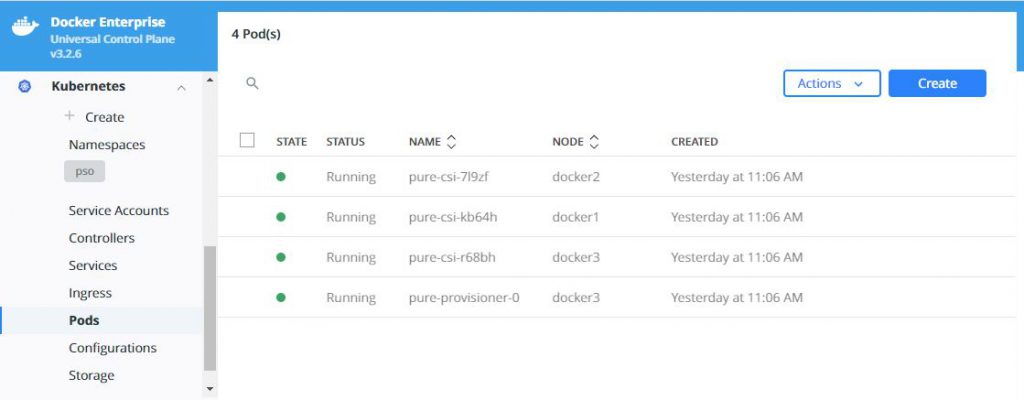
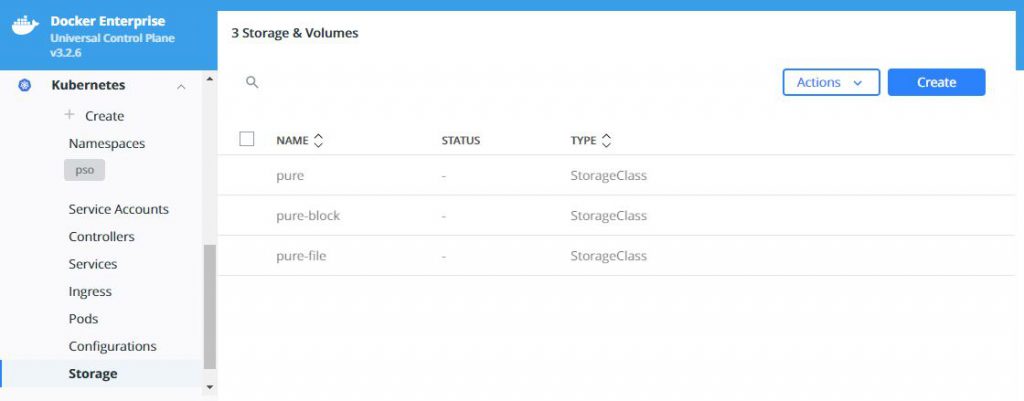
Now you can start using PSO to provide your persistent storage to your containerized applications, and if you enabled the feature-gates as suggested at the start of this blog, you could also take snapshots of your PVs and restore these to new volumes. For details on exactly how to do this read this: https://github.com/purestorage/helm-charts/blob/5.0.8/docs/csi-snapshot-clones.md, but make sure you install the VolumeSnapshotClass first wit this command:
# kubectl apply -f https://raw.githubusercontent.com/purestorage/helm-charts/master/pure-csi/snapshotclass.yaml
The version of Kubernetes provided in Docker UCP 3.2.6 does not support volume
cloning, but future releases may enable this functionality – check with Docker
UCP and Docker EE release notes.
