Portworx 2.8 with FlashArray and FlashBlade Getting Started

Getting Started with Portworx 2.8 and the FlashArray and FlashBlade

Last week Portworx 2.8 went GA, with it new support for Tanzu TKGs TKGm (We supported PKS/TKGi for a long time), but also Support for Cloud Drives for FlashArray and Direct Access for FlashBlade. It also simplified the installation of Portworx with Tanzu from this earlier version.

FlashArray Volumes for Portworx

Portworx will automate creating a storage pool from volumes provisioned from the FlashArray. This is done for your during the install, you may specify the size of the volumes in the spec generator at https://central.portworx.com

Process to install

NOTE as of 8/4/21: This feature is in Tech Preview (contact me if you want to run in Production)

  1. Create the px-pure-secret from the pure.json file
  2. Generate your Portworx Cluster spec from https://central.portworx.com
  3. Install the PX-Operator (command at the end of the spec generator).
  4. Install the Portworx Storage Cluster

  1. https://docs.portworx.com/reference/pure-json-reference/
    Also look that the pure.json reference in order to get the API key and token in a secret for you to use with Portworx. The installation of Portworx detects this Kubernetes secret and uses that information to provision drives from the array.
    Check out the youtube demo:
FlashArray and FlashBlade from Portworx

Sample pure.json

{
    "FlashArrays": [
        {
            "MgmtEndPoint": "<first-fa-management-endpoint>",
            "APIToken": "<first-fa-api-token>"
        },
        {
            "MgmtEndPoint": "<second-fa-management-endpoint>",
            "APIToken": "<second-fa-api-token>"
        }
    ],
    "FlashBlades": [
        {
            "MgmtEndPoint": "<fb-management-endpoint>",
            "APIToken": "<fb-api-token>",
            "NFSEndPoint": "<fb-nfs-endpoint>",
        },
        {
            "MgmtEndPoint": "<fb-management-endpoint>",
            "APIToken": "<fb-api-token>",
            "NFSEndPoint": "<fb-nfs-endpoint>",
        }
    ]
}
kubectl create secret generic px-pure-secret --namespace kube-system --from-file=pure.json

Remember the secret must be called px-pure-secret and be in the namespace that you install Portworx.

Select Pure FlashArray

2. Generate the spec for the Portworx Cluster.

3. Install the PX-Operator – I suggest using what you get from the Spec generator online or down to a local file.

kubectl apply -f pxoperator.yaml

4. Install the Storage Cluster

kubectl apply -f px-spec.yaml

For FlashBlade!

Also included in the pure.json is the API Token and IP information for my FlashBlade. Since the FlashBlade runs NFS the K8s node mounts it directly. We call with Direct Attach and allows you to leverage your FlashBlade for data that may exist outside of the PX-Cluster. Watch the demo to see it in action. Create a StorageClass for FlashBlade and a PVC using that class. Portworx automates the rest.
More info:
https://docs.portworx.com/portworx-install-with-kubernetes/storage-operations/create-pvcs/pure-flashblade/

Links

https://docs.portworx.com/cloud-references/auto-disk-provisioning/pure-flash-array/
https://docs.portworx.com/reference/pure-json-reference/
https://docs.portworx.com/portworx-install-with-kubernetes/storage-operations/create-pvcs/pure-flashblade/

Pure Service Orchestrator 6 is now GA!

Smart Provisioning in PSO 6

Simon covers the details here:
https://blog.purestorage.com/pure-service-orchestrator-6-0/

Now if you used any of the old versions of PSO you know it can smart provision across Pure Storage arrays with a single storageClass for block and one for file. Today I am proud to share the mysterious and sometimes confusing third storageClass pure is no longer installed with PSO 6. The long story is that storage class was to support legacy systems that use the 1.0 version of our driver. There has been 2.5 years to get used to pure-block. So now with the upgrade you can make the right choice.

 jowings@asgard  ~/pso-values  k get sc
NAME         PROVISIONER   RECLAIMPOLICY   VOLUMEBINDINGMODE   ALLOWVOLUMEEXPANSION   AGE
pure-block   pure-csi      Delete          Immediate           true                   56s
pure-file    pure-csi      Delete          Immediate           true                   56s

Now you have only two obvious choices.

Hey, Don’t break EBS

TL;DR – EBS Volumes fail to mount when multipathd is installed on EKS worker nodes.

EKS and PSO Go Great together!

AWS Elastic Kubernetes Service is a great way to dive in with managed Kubernetes in the cloud. Pure Service Orchestrator integrates EKS worker nodes into the Cloud Block Store on AWS. I created this ansible playbook to make sure the right packages and services are started on my worker nodes.

---
- hosts: all
  become: yes
  tasks:
  - name:    Install prerequisites
    yum:     
      name: ['iscsi-initiator-utils', 'device-mapper-multipath']
      update_cache: yes
  - name:    Create directories
    file:
      path: "{{ item }}"
      state: directory
      mode: 0755
    with_items:
      - /etc/multipath
  - name: Copy file with owner and permissions
    copy:
      src: ./multipath.conf
      dest: /etc/multipath.conf
      owner: root
      group: root
      mode: '0644'
  - name: REstart iscsid
    service:
      name: iscsid
      state: restarted
  - name: REstart multipathd
    service:
      name: multipathd
      state: restarted

In my previous testing with PSO and EKS I was basically focused on using PSO only. Recently the use case of migrating from EBS to CBS has shown to be pretty valuable to our customers in the cloud. To create the demo I used an app I often use for demoing PSO. It is 2 Web server containers attached to a mySQL container with a persistent volume. Very easy. I noticed though as I was using the built in gp2 Storage Class it started behaving super odd after I installed PSO. I installed the AWS EBS CSI driver. Same thing. It could not mount volumes or snapshot them in EBS. PSO volumes on CBS worked just fine. I figure most customers don’t want me to break EBS.

After digging around the internet and random old Github issues there was no one thing seemingly having the same issue. People were having problems that had like 1 of the 4 symptoms. I decided to test when in my process it broke after I enabled the package device-mapper-multipath. So it wasn’t PSO as much as a very important pre-requisite to PSO causing the issue. What it came down to is the EBS volumes were getting grabbed by multipathd and the Storage Class didn’t know how to handle the different device names. So I had to find how to use multipathd for just the Pure volumes. The right settings in multipath.conf solved this. This is what I used as an example:

blacklist {
    device {
        vendor "*"
    }
}
blacklist_exceptions {
    device {
        vendor "PURE"
        product "*"
    }
}

I am telling multipathd to ignore everything BUT Pure. This solved my issue. So I saved this into the local directory and added the section in the ansible playbook to copy that file to each worker node in EKS.
1. Copy the ansible playbook above to a file prereqs.yaml
2. Copy the above multipath blacklist settings to multipath.conf and save to the same directory as prereqs.yaml
3. Run the ansible playbook as shown below. (make sure the inventory.ini has IP’s and you have the SSH key to login to each worker node.

# Make sure inventory.ini has the ssh IP's of each node. 
# prereqs.yaml includes the content from above

ansible-playbook -i inventory.ini -b -v prereqs.yaml -u ec2-user

This will install the packages, copy multipath.conf to /etc and restart the services to make sure they pick up the new config.

Building the Python Twitter Bot with Jenkins and Kubernetes – part 3

This is the third part of the blogs I have been writing to document building a Python based twitter bot and running it in a container and deploying it to Kubernetes. The first post was about building the python, the second was all about building the docker container and using a deployment in Kubernetes. This last part pulls it all together and lets Github, Jenkins and Kubernetes do the work for you.

Getting Started

Pre-requisites:

  1. Working Kubernetes Cluster
  2. Working Container Registry and your Kubernetes cluster is able to pull images from it.
  3. Jenkins and a service account Jenkins can use to do things in K8s.

Jenkinsfile

Go ahead and fork my repo https://github.com/2vcps/python-twitter-bot to your own github account.
Now looking at the Jenkinsfile below inside of the repo. Some things for your to modify for your environment.

  1. Create a serviceAccount to match the serviceAccountName field in the yaml. This is the permissions the pod building and deploying the bot will use to run during the process. If you get this wrong. There will be errors.
  2. make the the images in the file all exist in your private registry. The first image tag you see is used to run kubectl and kustomize. I suggest building this image from the cloud builders public repo. The docker file is here:
    https://github.com/GoogleCloudPlatform/cloud-builders-community/tree/master/kustomize
    The second image used is public kaniko image. Now using that specific build is the only way it will function inside of a container. Kaniko is a standalone tool to build container images. Does not require root access to the docker engine like a ‘docker build’ command does. Also notice there is a harbor-config volume that allows kaniko to push to my harbor registry. Please create the secret necessary for your container registry.
    Also notice the kubectl portion is commented out and is only left behind for reference. The Kustomize image contains both kubetctl and kustomize commands.
  3. Last thing to take note of is the commands kustomize uses to create a new deployment.yaml called builddeploy.yaml. This way we can build and tag the container image each time and the deployements will be updated with the new tag. We avoid using “latest” as that can cause issues and is not best practice.

podTemplate(yaml: """
kind: Pod
spec:
  serviceAccountName: jenkins-k8s
  containers:
  - name: kustomize
    image: yourregistry/you/kustomize:3.4
    command:
    - cat
    tty: true
    env:
    - name: IMAGE_TAG
      value: ${BUILD_NUMBER}
  - name: kubectl
    image: gcr.io/cloud-builders/kubectl
    command:
    - cat
    tty: true
    env:
    - name: IMAGE_TAG
      value: ${BUILD_NUMBER}
  - name: kaniko
    image: gcr.io/kaniko-project/executor:debug-539ddefcae3fd6b411a95982a830d987f4214251
    imagePullPolicy: Always
    command:
    - /busybox/cat
    tty: true
    env:
    - name: DOCKER_CONFIG
      value: /root/.docker/
    - name: IMAGE_TAG
      value: ${BUILD_NUMBER}
    volumeMounts:
      - name: harbor-config
        mountPath: /root/.docker
  volumes:
    - name: harbor-config
      configMap:
        name: harbor-config
"""
  ) {

  node(POD_LABEL) {
    def myRepo = checkout scm
    def gitCommit = myRepo.GIT_COMMIT
    def gitBranch = myRepo.GIT_BRANCH
    stage('Build with Kaniko') {
      container('kaniko') {
        sh '/kaniko/executor -f `pwd`/Dockerfile -c `pwd` --skip-tls-verify --destination=yourregistry/you/py-bot:latest --destination=yourregistry/you/py-bot:v$BUILD_NUMBER'
      }
    }
    stage('Deploy and Kustomize') {
      container('kustomize') {
        sh "kubectl -n ${JOB_NAME} get pod"
        sh "kustomize edit set image yourregistry/you/py-bot:v${BUILD_NUMBER}"
        sh "kustomize build > builddeploy.yaml"
        sh "kubectl get ns ${JOB_NAME} || kubectl create ns ${JOB_NAME}"
        sh "kubectl -n ${JOB_NAME} apply -f builddeploy.yaml"
        sh "kubectl -n ${JOB_NAME} get pod"
      }
    }
    // stage('Deploy with kubectl') {
    //   container('kubectl') {
    //     // sh "kubectl -n ${JOB_NAME} get pod"
    //     // sh "kustomize version"
    //     sh "kubectl get ns ${JOB_NAME} || kubectl create ns ${JOB_NAME}"
    //     sh "kubectl -n ${JOB_NAME} apply -f deployment.yaml"
    //     sh "kubectl -n ${JOB_NAME} get pod"
    //   }
    // }
  }   
}

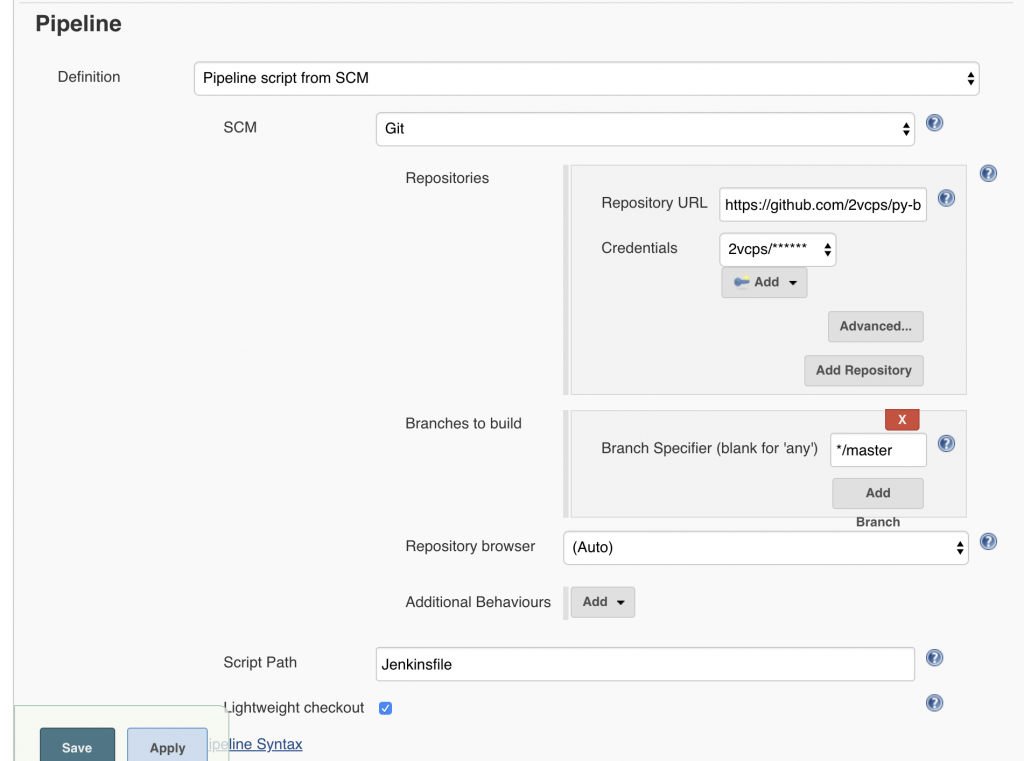
Create a jenkins pipeline and name it however you like, the important part is to set the Pipeline section to “Pipleline script from SCM”. This way Jenkins knows to use the Jenkinsfile in the git repository.

Webhooks and Build Now

Webhooks are what Github uses to push a new build to Jenkins. Due to the constraints of my environment I am not able to do this. My Jenkins instance cannot be contacted by the public API of Github. For now I have to click “Build Now” manually. I do suggest in a fully automated scenario investigating how to configure webhooks so that on every commit you can trigger a new pipeline build.
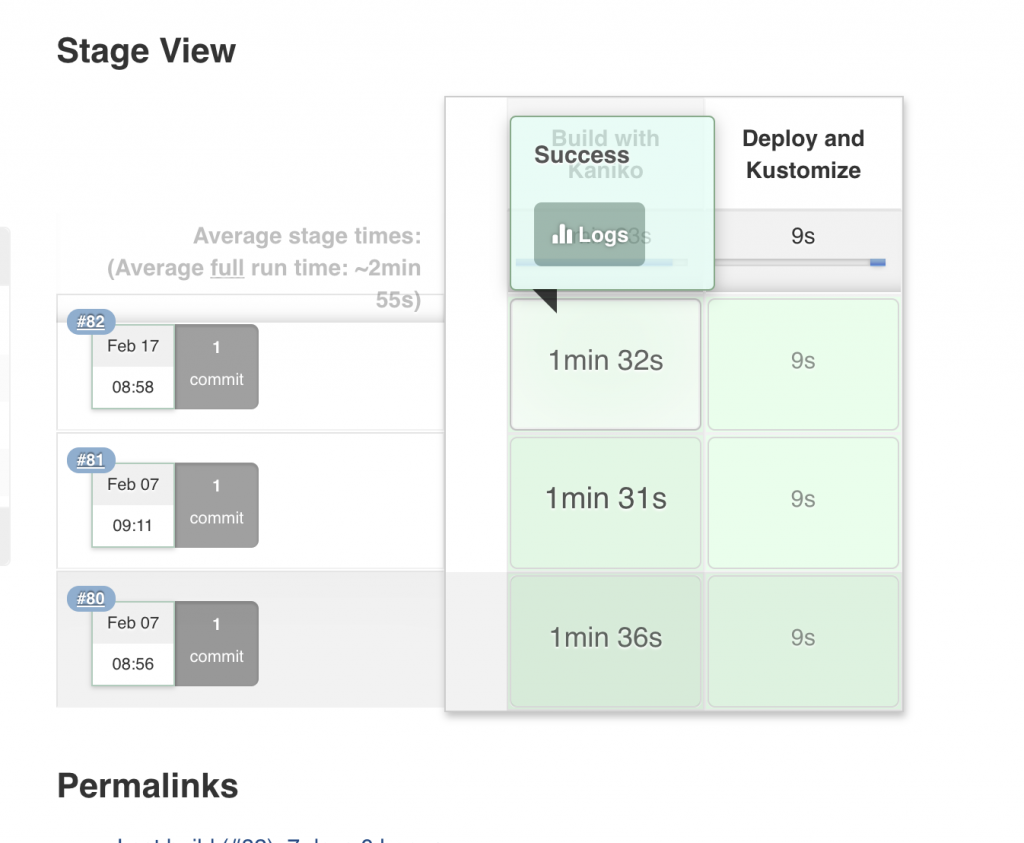
What the build is successful you should see some lovely green stages like below. In this example there are only 2 stages. Build with Kaniko, this builds the container image and pushes to my internal repo (Harbor). Then Deploy and Kustomize, which takes the new image and updates the 3 deployments in my Kubernetes cluster.

Output from Kubectl:

Use PKS Enterprise on VMware SDDC and Pure Storage

Use PKS Enterprise on VMware SDDC and Pure Storage

Pivotal Container Services (PKS) provides a deeply integrated Kubernetes (k8s) architecture for the VMware SDDC. It is a joint engineering project from VMware and Pivotal. In my conversations with Pure Storage customers or potential customers around Kubernetes I often get asked about how Pure Storage can help a PKS Enterprise environment. The good news is there is a very easy path to utilizing k8s with Pure + VMware + PKS.

The Architecture

Using Pure with PKS is actually very straight forward. Since Pure FlashArray is already leading choice for all VMware environments it is not anything out of the ordinary to support PKS. 

Understanding the underlying technology that integrates PKS into VMware you may soon realize that highly reliable, stateless and shared storage is the best choice when deploying PKS. 

The choice between drivers (shown in the graphic above) to deliver the Storage is up to you. The vSphere Cloud Provider provides automated creation and management of the virtual disks presented to containers in PKS. This supports the use of vVols and enables great possibilities for your PKS environment.  Pure Service Orchestrator utilizes a direct connection to Pure Storage FlashArrays, FlashBlades and Cloud Block Stores. It is installed with a single Helm command or Kubernetes Operator. It includes Smart Provisioning in order to place volumes on the most optimal storage device in your fleet.

The choice of which tool will be dictated by your workload. It is not an exclusive choice either. It is easy to do both. After VMworld I hope to publish the details on how to install PSO on PKS. If you have really good github search foo you may be able to find the bosh deployment.

Highly Reliable

Pure Storage has measured 6×9’s of uptime across its customer base. Many storage solutions for container environments will require hours of planning and weeks of proper implementation to provide high availability. Do not spend time re-architecting your storage infrastructure for PKS. Spend your time delivering k8s to your customers so they can deliver innovation for your business.  Use the Pure Storage devices you already have. You may not even need a whole new dedicated array (don’t tell sales I said that). 

Stateless Arrays for Stateful Data

Migrating data should be eliminated from your daily tasks. As FlashArrays move further into the future where data always stays in place. The ability to keep the data in place for multiple hardware generations is a proven benefit of Pure. Migrating persistent storage in k8s even on VMware is a non-trivial task. Depending on your scale this could take weeks of planning and careful flawless execution to accomplish non-disruptively. The underlying hardware should not be a concern for delivering applications. Pure Storage has made this a reality since the FlashArray debut 7 years ago.

Shared Storage

Delivering highly reliable data across multiple PKS and vSphere clusters, allowing applications to failover if the compute in an availability zone becomes unavailable, is key to delivering a cloud experience for your k8s rollout. While the Pure sales teams would gladly help you acquire a FlashArray per vSphere cluster hosting PKS this is simply un-needed for nearly all situations. Especially as you start on your Kubernetes journey.

But Why PURE?

Simple; vVols on the FlashArray combined with the PKS integration with vSphere enables mobility of data and freedom unavailable on a legacy datastore. Have a group that rolled their own k8s? FlashArray can clone their persistent data instantly into PKS using vVols. Need to copy data from a bare metal (non-VM) k8s cluster to PKS? Pure vVols makes this possible. Have multiple k8s clusters within PKS today that require the same data for test/dev/prod Pure Storage enables this nearly instantly. Pure Storage FlashArray Snapshots and Clones move at the speed of an API call from any of our SDK’s from Python to Powershell to Ansible to Terraform and more to give you an easy way to fit Pure Storage into your Infrastructure as Code tools. 

You can probably spend the next 5 hours reading blogs and papers of all the other benefits of Pure Storage and they all apply to your PKS on vSphere environment but I wanted to provide a few examples directly related to operating PKS on Pure.

VMworld 2019 Session

In my session for VMworld in San Francisco I will demonstrate how Pure Storage is able to instantly migrate persistent volumes from “other” k8s clusters to PKS. Make sure you make it to this session if you considering PKS.

Getting Started with Pure Service Orchestrator and Helm

Why Pure Service Orchestrator?

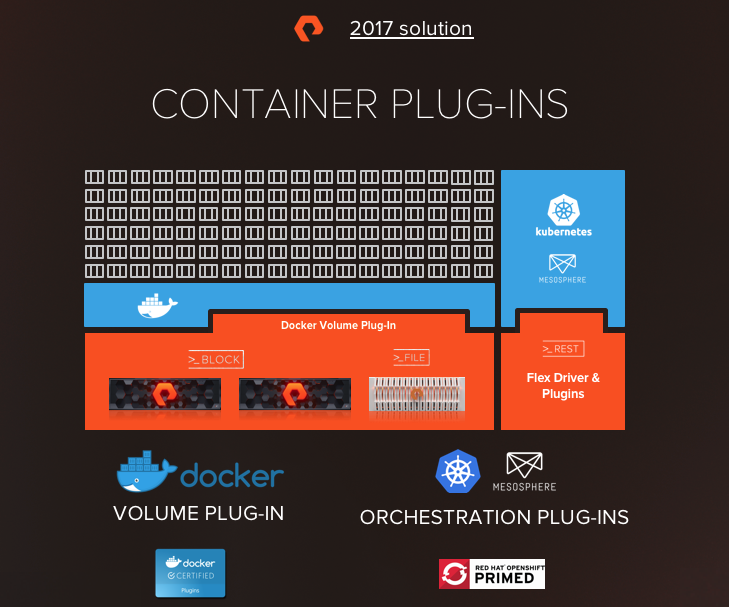
At Pure we have been working hard to develop a way to provide a persistent data layer that is able to meet the expectations of our customers for ease of use and simplicity.  The first iteration of this was the release as the Docker and Kubernetes Plugins.

The plugins provided automated storage provisioning. Which solved a portion of the problem.  All the while, we were working on the service that resided within those plugins. A service that would allow us to bring together managing many arrays. Both block and file.

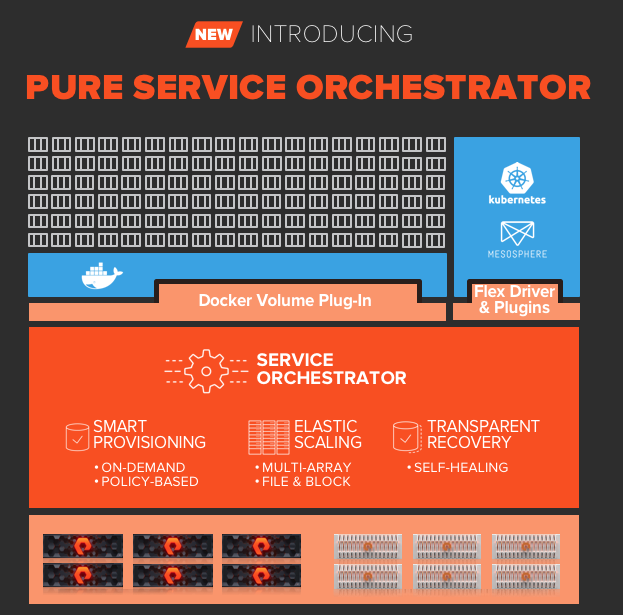
The new Pure Service Orchestrator will allow smart provisioning over many arrays. On-demand persistent storage for developers placed on the best array or adhering to your policies based on labels.

To install you can use the traditional shell script as described in the readme file here.

The second way that may fit into your own software deployment strategy is using Helm. Since using Helm provides a very quick and simple way to install and it may be new to you the rest of this post will be how to get started with PSO using Helm.

Installing Helm

Please be sure to install Helm using the correct RBAC intructions.

I describe the process in my blog here.

http://54.88.246.86/2018/03/27/getting-started-with-helm-for-k8s/ 

Also, get acquainted with the official Helm documentation at the following site:

https://docs.helm.sh/using_helm/

Once Helm is fully functioning with your Kubernetes cluster run the following commands to setup and Pure Storage Helm repo:

helm repo add pure https://purestorage.github.io/helm-charts
helm repo update
helm search pure-k8s-plugin

Additionally, you need to create a YAML file with the following formate and contents:

arrays:
  FlashArrays:
    - MgmtEndPoint: "1.2.3.4"
      APIToken: "a526a4c6-18b0-a8c9-1afa-3499293574bb"
      Labels:
        rack: "22"
        env: "prod"
    - MgmtEndPoint: "1.2.3.5"
      APIToken: "b526a4c6-18b0-a8c9-1afa-3499293574bb"
  FlashBlades:
    - MgmtEndPoint: "1.2.3.6"
      APIToken: "T-c4925090-c9bf-4033-8537-d24ee5669135"
      NFSEndPoint: "1.2.3.7"
      Labels:
        rack: "7b"
        env: "dev"
    - MgmtEndPoint: "1.2.3.8"
      APIToken: "T-d4925090-c9bf-4033-8537-d24ee5669135"
      NFSEndPoint: "1.2.3.9"
      Labels:
        rack: "6a"

You can run a dry run of the installation if you want to see the output but not change anything on your cluster. It is important to remember the path to the yaml file you created above.

helm install --name pure-storage-driver pure/pure-k8s-plugin -f <your_own_dir>/yourvalues.yaml --dry-run --debug

If you are satisfied with the output of the dry run you can run the install now.

helm install --name pure-storage-driver pure/pure-k8s-plugin -f <your_own_dir>/yourvalues.yaml

Please check the GitHub page hosting the Pure Storage repo for more detail.

https://github.com/purestorage/helm-charts/tree/master/pure-k8s-plugin#how-to-install

Setting the Default StorageClass

Since we do not want to assume you only have Pure Storage in you environment we do not force ‘pure’ as the default StorageClass in Kubernetes.

If you already installed the plugin via helm and need to set the default class to pure run this command.

kubectl patch storageclass pure -p '{"metadata": {"annotations":{"storageclass.kubernetes.io/is-default-class":"true"}}}'

If you have another storage class set to default and you wish to change it to Pure you must first remove the default tag from the other StorageClass and then run the command above. Having two defaults will produce undesired results.  To remove the default tag run this command.

kubectl patch storageclass <your-class-name> -p '{"metadata": {"annotations":{"storageclass.kubernetes.io/is-default-class":"false"}}}'

Read more about these commands from the K8s documentation.

https://kubernetes.io/docs/tasks/administer-cluster/change-default-storage-class/

Demo

Maybe you are a visual learner check out these two demos showing the Helm installation in action.

Updating your Array information

If you need to add a new FlashArray or FlashBlade simply add the information to your YAML file and update via Helm. You may edit the config map within Kubernetes and there are good reasons to do it that way, but for simplicity we will stick to using helm for changes to the array info YAML file. Once your file contains the new array or label run the following command.

helm upgrade pure-storage-driver pure/pure-k8s-plugin -f <your_own_dir>/yourvalues.yaml --set ...

Upgrading using Helm

With the same general process you can use the following command and update the version of Pure Service Orchestrator.

helm upgrade pure-storage-driver pure/pure-k8s-plugin -f <your_own_dir>/yourvalues.yaml --version <target version>

Upgrading from the legacy plugin to the Helm version

Follow the instructions here:

https://github.com/purestorage/helm-charts/tree/master/pure-k8s-plugin#how-to-upgrade-from-the-legacy-installation-to-helm-version

There are a few platform specific considerations you should make if you are using any of the following.

  1. Containerized Kubelet (Some flavors of K8s do this, Rancher and Openshift are two).
  2. CentOS/RHEL Atomic Linux
  3. CoreOS
  4. OpenShift
  5. OpenShift Containerized Deployment

Be certain to read through the notes if you use any of these platform versions.

https://github.com/purestorage/helm-charts/tree/master/pure-k8s-plugin#how-to-upgrade-from-the-legacy-installation-to-helm-version

https://github.com/purestorage/helm-charts/tree/master/pure-k8s-plugin#platform-specific-considerations

My SSH Issue Docker Swarm hosts

That one time you all of sudden could not SSH into your Docker Swarm hosts?

I am writing this so I will remember to be smarter next time.

Ever Get this?

minas-tirith:~ jowings$ ssh scarif
@@@@@@@@@@@@@@@@@@@@@@@@@@@@@@@@@@@@@@@@@@@@@@@@@@@@@@@@@@@
@ WARNING: REMOTE HOST IDENTIFICATION HAS CHANGED! @
@@@@@@@@@@@@@@@@@@@@@@@@@@@@@@@@@@@@@@@@@@@@@@@@@@@@@@@@@@@
IT IS POSSIBLE THAT SOMEONE IS DOING SOMETHING NASTY!

I started to flip out and wondered why this just all of sudden happened on all four host in my swarm cluster. Was something actually nasty happening? Probably not, but you never know. I thought I broke the pub key on my mac. because I went into .ssh/known_hosts and removed the entry for my hosts as I quite commonly see this because I rebuild vm’s and hosts all the time. Then I got something different and got the same exact error from my Windows 10 machine.

Permission denied (publickey).

Pretty sure I didn’t break 2 different ssh clients on 2 different computers.
What did I do?

$docker stack deploy -c gitlab.yml gitlab

So I am keeping local git copies and thoughs I would be smart to have Gitlab to run this service in my home lab.

Problem in my zeal to have git use stander ssh tcp port 22 to push my repos up to the server I did this:

version: '3'
services:
web:
image: 'gitlab/gitlab-ce:latest'
restart: always
hostname: 'gitlab1'
environment:
GITLAB_OMNIBUS_CONFIG: |
external_url 'http://gitlab.2vcps.local'
ports:
- '80:80'
- '443:443'
- '22:22'

So basically my gitlab service was now available using tcp/22 on my entire cluster. Even though the container is only on one host they way Docker overlay networking works is any host in that cluster will forward the request for tcp/22 to that container. The container without my public key, the container that no matter my hostname does not have the same SSH “ID” as my actual hosts.
Bad move JO.
So don’t do that and stuff.

To fix:

version: '3'
services:
web:
image: 'gitlab/gitlab-ce:latest'
restart: always
hostname: 'gitlab1'
environment:
GITLAB_OMNIBUS_CONFIG: |
external_url 'http://gitlab.2vcps.local'

ports:
- '80:80'
- '443:443'
- '12022:22'

I changed the port mapping for now. I can use HAPROXY later to use the virtual hostname and point traffic to the container.

$docker stack deploy -c gitlab.yml gitlab

and it updates the service with the new port mapping.

CockroachDB with Persistent Data

There IS an Official Whitepaper!

While I was writing this post the awesome Simon Dodsley was writing a great whitepaper on Persistent storage with Pure. As you can see there is some very different ways to deploy CockroachDB but the main goal is to keep your important data persistent no matter what happens to the containers as the scale, live and die.

I know most everyone loved seeing the demo of the most mission critical app in my house. I also want to show a few quick ways to leverage the Pure plugin to provide persistent data to a database. I am posting my files I used to create the demo here https://github.com/2vcps/crdb-demo-pure

First note
I started with the instructions provided here by Cockroach Labs.
This is an insecure installation for demo purposes. They do provide the instructions for a more Prod ready version. This is good enough for now.

Second note
The loadbalancer I used was created for my environment using the intructions to output the HAProxy file found here on the Cockroach Labs website:
https://www.cockroachlabs.com/docs/stable/generate-cockroachdb-resources.html

My yaml file refers to a docker image I built for the HAproxy loadbalancer. If it works for you cool! If not please follow the instructions above to create your own. If you really need to know more I can write another post showing how to take the Dockerfile and copy the CFG generated by CRDB into a new image just for you.


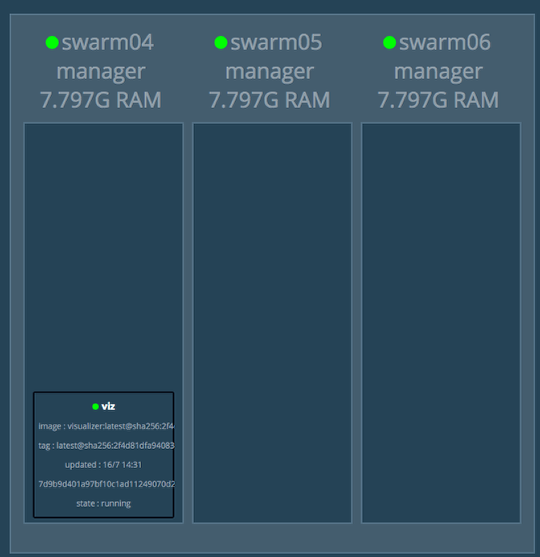
My nice little docker swarm

media_1501095950777.png

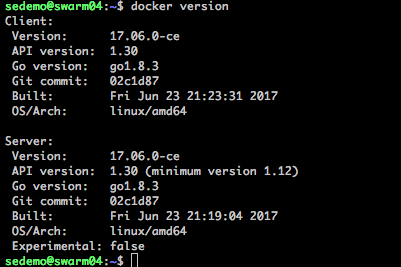
I have three VMware VM’s running Ubuntu 16.04. With Docker CE and the Pure plugin already installed. Read more here if you want to install the plugin.

media_1501096079095.png

Run the deploy

https://github.com/2vcps/crdb-demo-pure/blob/master/3node-cockroachdb-pure.yml

version: '3.1'
services:
    db1:
      image: cockroachdb/cockroach:v1.0.2
      deploy:
            mode: replicated
            replicas: 1
      ports:
            - 8888:8080
      command: start --advertise-host=cockroach_db1 --logtostderr --insecure
      networks:
            - cockroachdb
      volumes:
            - cockroachdb-1:/cockroach/cockroach-data
    db2:
      image: cockroachdb/cockroach:v1.0.2
      deploy:
         mode: replicated
         replicas: 1
      command: start --advertise-host=cockroach_db2 --join=cockroach_db1:26257 --logtostderr --insecure
      networks:
         - cockroachdb
      volumes:
         - cockroachdb-2:/cockroach/cockroach-data
    db3:
      image: cockroachdb/cockroach:v1.0.2
      deploy:
         mode: replicated
         replicas: 1
      command: start --advertise-host=cockroach_db3 --join=cockroach_db1:26257 --logtostderr --insecure
      networks:
         - cockroachdb
      volumes:
         - cockroachdb-3:/cockroach/cockroach-data
    crdb-proxy:
      image: jowings/crdb-proxy:v1
      deploy:
         mode: replicated
         replicas: 1
      ports:
         - 26257:26257
      networks: 
         - cockroachdb

networks:
    cockroachdb:
        external: true

volumes:
    cockroachdb-1:
      driver: pure
    cockroachdb-2:
      driver: pure
    cockroachdb-3:
      driver: pure


#docker stack deploy -c 3node-cockroachdb-pure.yml cockroach

Like it shows in the compose file This command deploys 4 services. 3 database nodes and 1 HAproxy. Each database node gets a brand new volume attached directly to the path by the Pure Docker Volume Plugin.

New Volumes

media_1501098437804.png

Each new volume created and attached to the host via iSCSI and mounted into the container.

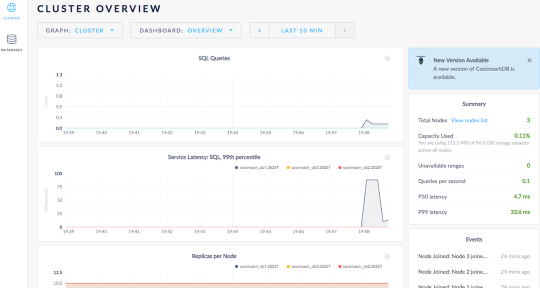
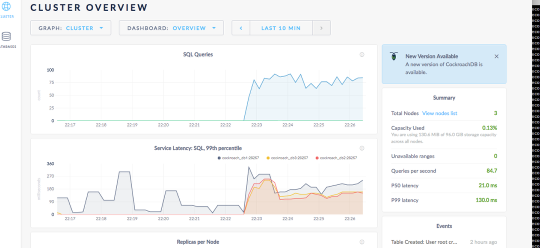
Cool Dashboard

media_1501098544719.png

Other than being no data do you notice something else?
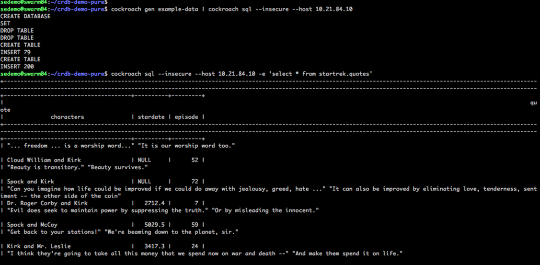
First lets generate some data.
I run this from a client machine but you can attach to one of the DB containers and run this command to generate some sample data.

cockroach gen example-data | cockroach sql --insecure --host [any host ip of your docker swam]

media_1501098910914.png

I am also going to create a “bank” database and use a few containers to start inserting data over and over.

cockroach sql --insecure --host 10.21.84.7
# Welcome to the cockroach SQL interface.
# All statements must be terminated by a semicolon.
# To exit: CTRL + D.
root@10.21.84.7:26257/> CREATE database bank;
CREATE DATABASE
root@10.21.84.7:26257/> set database = bank;
SET
root@10.21.84.7:26257/bank> create table accounts (
-> id INT PRIMARY KEY,
-> balance DECIMAL
-> );
CREATE TABLE
root@10.21.84.7:26257/bank> ^D

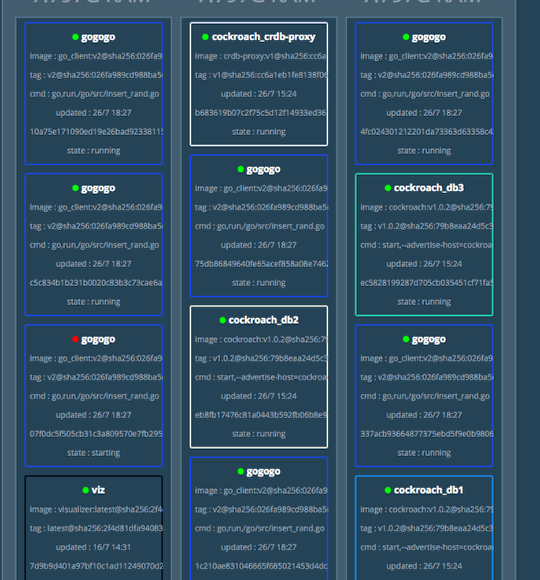
I created a program in golang to insert some data into the database just to make the charts interesting. This container starts, inserts a few thousand rows then exits. I run it as a service with 12 replicas so it is constantly going, I call it gogogo because I am funny.

media_1501108005294.png

gogogo

media_1501108062456.png
media_1501108412285.png

You can see the data slowly going into the volumes.

media_1501171172944.png

Each node remains balanced (roughly) as cockroachdb stores that data.

What happens if a container dies?

media_1501171487843.png

Lets make this one go away.

media_1501171632191.png

We kill it.
Swarm starts a new one. The Docker engine uses the Pure plugin and remounts the volume. The CRDB cluster keeps on going.
New container ID but the data is the same.

media_1501171737281.png

Alright what do I do now?

media_1501171851533.png

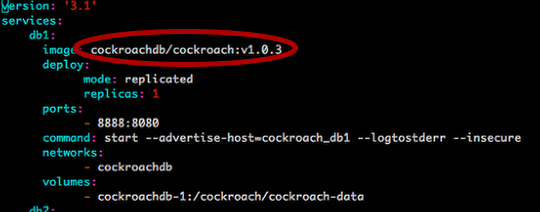
So you want to update the image to the latest version of Cockroach? Did you notice this in our first screenshot?

Also our database is getting a lot of hits, (not really but lets pretend), so we need to scale it out. What do we do now?

https://github.com/2vcps/crdb-demo-pure/blob/master/6node-cockroachdb-pure.yml

version: '3.1'
services:
    db1:
      image: cockroachdb/cockroach:v1.0.3
      deploy:
            mode: replicated
            replicas: 1
      ports:
            - 8888:8080
      command: start --advertise-host=cockroach_db1 --logtostderr --insecure
      networks:
            - cockroachdb
      volumes:
            - cockroachdb-1:/cockroach/cockroach-data
    db2:
      image: cockroachdb/cockroach:v1.0.3
      deploy:
         mode: replicated
         replicas: 1
      command: start --advertise-host=cockroach_db2 --join=cockroach_db1:26257 --logtostderr --insecure
      networks:
         - cockroachdb
      volumes:
         - cockroachdb-2:/cockroach/cockroach-data
    db3:
      image: cockroachdb/cockroach:v1.0.3
      deploy:
         mode: replicated
         replicas: 1
      command: start --advertise-host=cockroach_db3 --join=cockroach_db1:26257 --logtostderr --insecure
      networks:
         - cockroachdb
      volumes:
         - cockroachdb-3:/cockroach/cockroach-data
    crdb-proxy:
      image: jowings/crdb-haproxy:v2
      deploy:
         mode: replicated
         replicas: 1
      ports:
         - 26257:26257
      networks: 
         - cockroachdb
    db4:
      image: cockroachdb/cockroach:v1.0.3
      deploy:
         mode: replicated
         replicas: 1
      command: start --advertise-host=cockroach_db4 --join=cockroach_db1:26257 --logtostderr --insecure
      networks:
         - cockroachdb
      volumes:
         - cockroachdb-4:/cockroach/cockroach-data
    db5:
      image: cockroachdb/cockroach:v1.0.3
      deploy:
         mode: replicated
         replicas: 1
      command: start --advertise-host=cockroach_db5 --join=cockroach_db1:26257 --logtostderr --insecure
      networks:
         - cockroachdb
      volumes:
         - cockroachdb-5:/cockroach/cockroach-data
    db6:
      image: cockroachdb/cockroach:v1.0.3
      deploy:
         mode: replicated
         replicas: 1
      command: start --advertise-host=cockroach_db6 --join=cockroach_db1:26257 --logtostderr --insecure
      networks:
         - cockroachdb
      volumes:
         - cockroachdb-6:/cockroach/cockroach-data
networks:
    cockroachdb:
        external: true

volumes:
    cockroachdb-1:
      driver: pure
    cockroachdb-2:
      driver: pure
    cockroachdb-3:
      driver: pure
    cockroachdb-4:
      driver: pure
    cockroachdb-5:
      driver: pure
    cockroachdb-6:
      driver: pure
$docker stack deploy -c 6node-cockroachdb-pure.yml cockroach

(important to provide the name of the stack you already used, or else errors)

media_1501172007803.png

We are going to update the services with the new images.

  1. This will replace the container with the new version — v1.0.3
  2. This will attach the existing volumes for nodes db1,db2,db3 to the already created FlashArray volumes.
  3. Also create new empty volumes for the new scaled out nodes db4,db5,db6
  4. CockroachDB will begin replicating the data to the new nodes.
  5. My gogogo client “barage” is still running

This is kind of the shotgun approach in this non-prod demo environment. If you want no downtime upgrades to containers I suggest reading more on blue-green deployments. I will show how to make the application upgrade with no downtime and use blue-green in another post.

Cockroach DB begins to reblance the data.

media_1501172638117.png

6 nodes

media_1501172712079.png

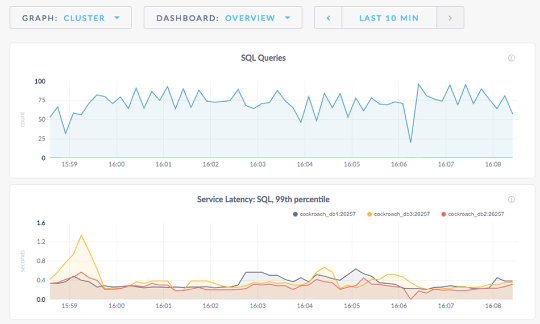
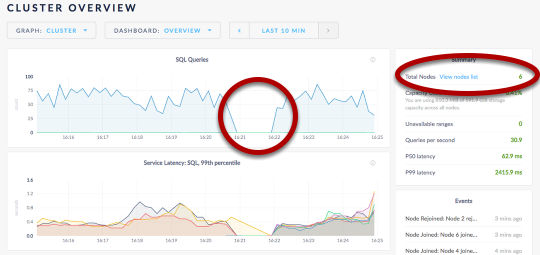
If you notice the gap in the queries it is becuase I updated every node all at once. A better way would be to do one at a time and make sure each node is back up while they “roll” through the upgrade to the new image. Not prod remember?

media_1501172781312.png
media_1501172828992.png

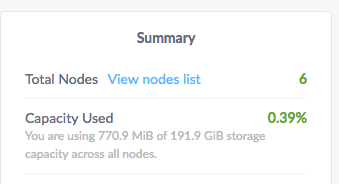
Application says you are using 771MiB of your 192GB. While the FlashArray is using just maybe 105MB across these volumes.

A little while later…

media_1501175811897.png

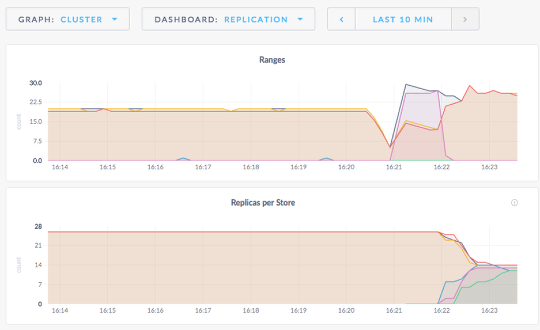
Now we are mostly balanced with replicas in each db node.

Conclusion
This is just scratching the surface and running highly scalable data applications in containers with persistent data on a FlashArray. Are you a Pure customer or potential Pure customer about to run stateful/persistent apps on Docker/Kubernetes/DCOS? I want to hear from you. Leave a comment or send me a message on Twitter @jon_2vcps.

If you are a developer and have no clue what your infrastructure team does or is doing I am here to help make everyone’s life better. No more weekend long deployments or upgrades. Get out of doing storage performance troubleshooting.

Go to more of your kids soccer games.

Using the Docker Volume Plugin with Docker Swarm

Remember the prerequisites. Check the official README for the latest information. Official README

Platform and Software Dependencies

Operating Systems Supported:

  • CentOS Linux 7.3
  • CoreOS (Ladybug 1298.6.0 and above)
  • Ubuntu (Trusty 14.04 LTS, Xenial 16.04.2 LTS)

Environments Supported :

  • Docker (v1.13 and above)
  • Swarm
  • Mesos 1.8 and above

Other software dependencies:

  • Latest iscsi initiator software for your operating system
  • Latest linux multipath software package for your operating system

Review: To install the plugin –


docker plugin install store/purestorage/docker-plugin:1.0 --alias pure

OR if you are annoyed by having to hit Y for the permissions the plugin requests.


docker plugin install store/purestorage/docker-plugin:1.0 --alias pure --grant-all-permissions

The installation process is the same as a standalone docker host except you must specify your clusterid. This is a unique string you assign to your swarm nodes.


docker plugin disable pure
docker plugin set pure PURE_DOCKER_NAMESPACE=<clusterid>
docker plugin enable pure

When you first install the Pure Volume Plugin the plugin is enabled. Docker will not allow you to modify the namespace while the plugin is in use. So we need to disable the plugin before making changes. This also means it is best to do this before creating and using any volumes.

Remember to put your API token and array management IP in the pure.json file under /etc/pure-docker-plugin/ – for each host.

More information Here

Demo for setting up Swarm and testing container failover

Previous post about installing the Plugin

Pure Storage Docker Plugin

This is a quick guide and how to install the Pure plugin for docker 1.13 and above. For full details check out Pure Volume Plugin on Store.docker.com.

Requirements


Operating Systems Supported

CentOS Linux 7.3
CoreOS (Ladybug 1298.6.0 and above)
Ubuntu (Trusty 14.04 LTS, Xenial 16.04.2 LTS)
Environments Supported

Docker 1.13+ I am on 17.03-ce
Swarm
Mesos 1.8 and above
Other dependencies

Latest iSCSI initiator SW
Latest Multipath package (This made a difference for me on Ubuntu remember to update!)

Hosts Before

media_1501006005257.png

Here I am just listing the Pure hosts on my array before I install the plugin.

Volumes Before

media_1501006035507.png

Also listing out my volumes, these are all pre-existing.

Pull and Install the plugin (Docker 1.13 and above)

Create /etc/pure-docker-plugin/pure.json

media_1501006093681.png

edit the file pure.json in /etc/pure-docker-plugin and add your array and API token
to get a token from the Pure CLI – (or go to the GUI of the array and copy the API token for your user).


pureeadmin create –api-token [user]
pureadmin list –api-token [user] –expose

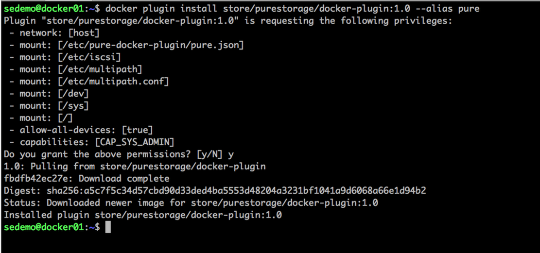
Pull the plugin and Install

media_1501006156094.png

docker plugin install store/purestorage/docker-plugin:1.0 –alias pure

Grant the plugins to the directories it requests.

Done. Easy.

For Docker Swarm

Setting the PURE_DOCKER_NAMESPACE variable can be done with the command:

docker plugin set pure PURE_DOCKER_NAMESPACE=<clusterid>

My next blog post will dive more into setting up the plugin with Docker Swarm. The clusterid is just a unique string. Keep it simple.

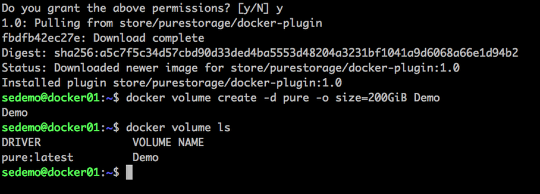
Test it

media_1501006217870.png

$docker volume create -d pure -o size=200GiB Demo

Remember if you want to create the volume with other units the information is in the README but here it is for now:<Units can be specified as xB, xiB, or x. If no units are specified MiB is assumed.

My host created by the plugin

media_1501006373816.png

Now that I created a volume on the array the host docker01 is now added to the list of hosts. The plugin automates adding the iSCSI IQN and creating the host.

My new volume all ready to go

media_1501006405843.png

You also see the docker01-Demo is listed and sized to my requested 200GiB The PURE_DOCKER_NAMESPACE will prepend the volume name you create. The default will use the docker hostname. In a Mesos and Swarm environment the namespace setting mentioned above is used. This is only identified this way on the array.

Now the volume can be mounted to a container using


#docker run –volume Demo:/data [image] [command]
You could also create a new volume and mount it to a container all in the same line with:


#docker run –volume-driver pure –volume myvolume:/data [image] [command]